
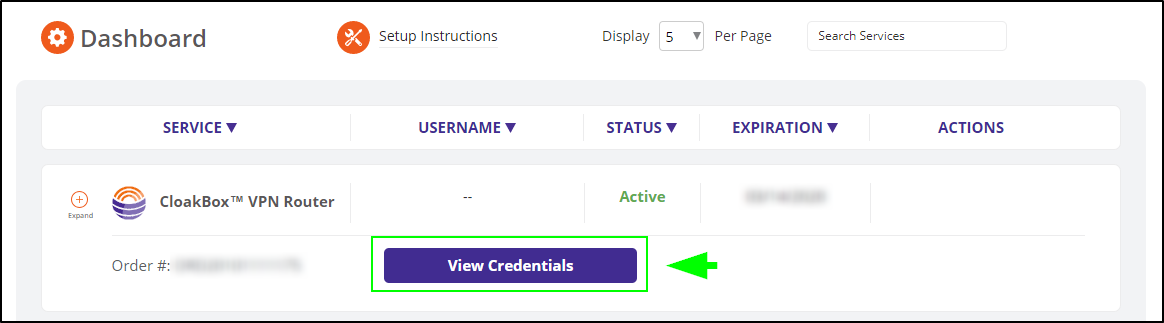
1) Log into your dashboard here. Then, next to your CloakBox order # click View Credentials
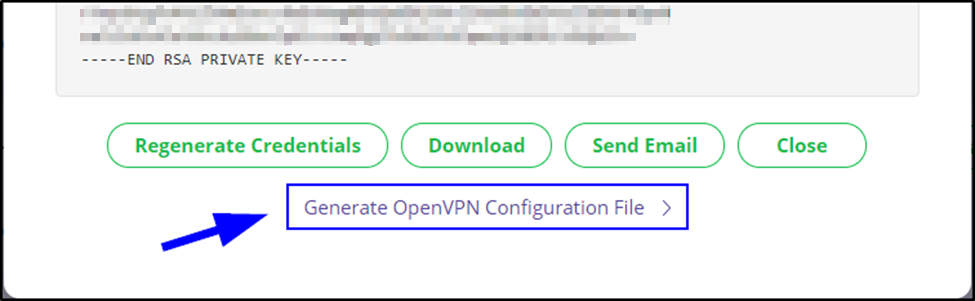
2) Scroll to the bottom of the popup that appears, and click Generate OpenVPN Configuration File
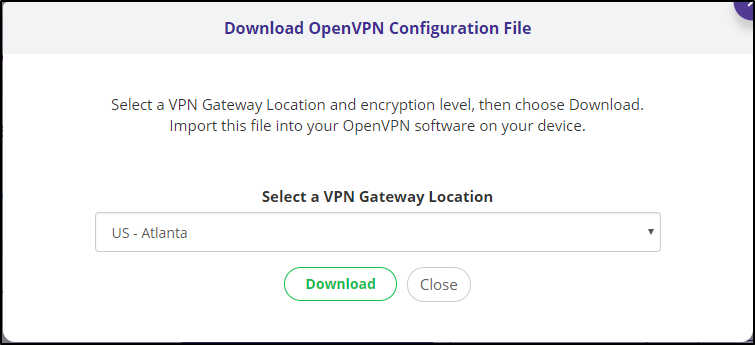
3) In the Download OpenVPN Configuration popup that appears select the VPN gateway you wish to connect to and click Download. In this example we’ve selected Atlanta.
The file will download to the folder where you usually download files from the internet
(Note: By default, this is the ‘Downloads’ folder on both Mac and Windows)
4) Next, log into your CloakBox to upload the OpenVPN configuration you just downloaded.
5) Once you have logged into your CloakBox, click: VPN -> VPN Client tab at the top
6) Click Choose File, navigate to and select the OpenVPN .ovpn file that you download in the above steps (#3), then click upload.
7) Wait for Complete to appear and for the page to refresh.
8) Update the Description
9) Click on the service state switch to enable (connect) the VPN connection and wait for Connect to appear.
10) Click on Yes by the Automatic start at boot time option.
11) Click Apply at the bottom of the page.
Recent Comments